Authentication & Authorization
In order to leverage the Worlds GraphQL API in a custom integration, each request must be authenticated with the server. Worlds accomplishes this via the use of a two-part API key known as the Token ID and the Token Value. To be authenticated, each request must pass the Token ID and the Token Value via its headers or, in the case of subscriptions, within the connection initialization message.
Retrieving the Tokens
Accessing the authentication tokens must be performed via the Worlds application by a system admin. Please note that while the authentication tokens may be changed, the Worlds API currently only supports one level of authorization and only one set of tokens per “company”; be sure to treat the Token Value as you would any other password or secret for other applications or integrations.
- Log in to the Worlds application as a system administrator.
-
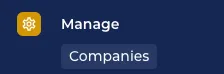
In the left-hand menu sidebar, click the button labeled “Companies” listed
-
Locate the company for which you want to generate the API credentials, and click the corresponding “Edit” button.
-
On the new screen, locate the “API Credentials” section and click the “Generate API Credentials” button within the section. This will open an overlay.

-
Copy the Token ID and the Token Value indicated in the overlay.
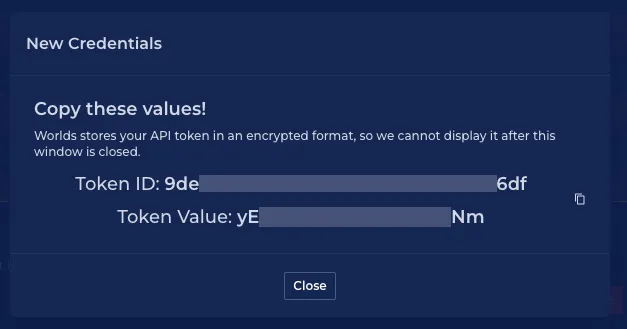
Note: Visible portions of the Token ID and Value are for demonstration only; your Token ID and Value may not match.
Please note that you will not be able to access the Token Value again, although the Token ID will be visible to confirm whether it is in use. Treat the Token Value as you would other passwords or application secrets.
Using the Tokens
Once you have your authentication tokens, you’ll be ready to issue queries, mutations, and subscriptions via the GraphiQL Explorer. In order to connect your application, however, you’ll need to configure your client.
Query and Mutation Authentication
The API’s request URI is
When issuing Queries and Mutations over HTTP or HTTPS, Worlds uses HTTP request headers to authenticate the request. The headers should be provided as follows:
X-Token-Id: 9de...X-Token-Value: yE...When using the Apollo GraphQL library, you must pass your Token ID and Value as
headers in the constructor for the HttpLink, as follows:
import { HttpLink } from '@apollo/client/core/index.js';
export const link = new HttpLink({  uri: "https://graphql.../graphql", //The API's request URI should go here  headers: {    "x-token-id": "9de...",    "x-token-value": "yE..."  },});
For a complete example, see the Tutorial for Geofences.
Subscription Authentication
The API’s websocket URI is
As noted in About subscriptions, Worlds uses the
graphql-transport-ws protocol for Subscriptions. In order to authenticate
using this protocol, send a “payload” as part of the ConnectionInit
message that contains the following object:
{ "x-token-id": "9de...", "x-token-value": "yE..."}When using the Apollo GraphQL library, you must pass your Token ID and Value via
the graphql-ws createClient function, as follows:
import { GraphQLWsLink } from '@apollo/client/link/subscriptions/index.js';import { createClient } from 'graphql-ws';import { WebSocket } from 'ws';
export const wsLink = new GraphQLWsLink(createClient({  // webSocketImpl required in Node.js  webSocketImpl: WebSocket,  url: 'wss://graphq.../graphql', //The API's websocket URI should go here  connectionParams: {    "x-token-id": "9de...",    "x-token-value": "yE..."  },}));
While the GraphQLWsLink class would work for queries and mutations, when using
both queries and subscriptions in Apollo, splitLink should be used. See Split
communication by operation for more details.
For a complete example, see the Tutorial for Geofences.